

Neurodesk App
Determine system privileges
Section titled “Determine system privileges”Before running the app, check whether your system has privileged access (root/admin permissions). This determines which engine you need to use to run the app:
- If you have privileged access → use the Docker or Podman engine.
- If you do not have privileged access → use the TinyRange engine, or run a remote instance.
Minimum system requirements
Section titled “Minimum system requirements”- At least 5 GB free space for the Neurodesktop base image.
- One of the following options, depending on system privileges:
- With privileged access: Docker or Podman to run the respective engines.
- Without privileged access: the TinyRange engine (included with Neurodesk App) and QEMU (only on macOS).
Downloading Neurodesk App
Section titled “Downloading Neurodesk App”More variants: macOS Apple silicon · Debian/Ubuntu arm64 · Red Hat arm64
Installing Docker
Section titled “Installing Docker”The Neurodesk App requires Docker to be installed on your computer. If you already have Docker installed, you can skip this step.
After installation, open a terminal (Linux/macOS) or command prompt (Windows) and run the following command to verify that Docker is working correctly:
docker --versiondocker run hello-worldInstalling QEMU
Section titled “Installing QEMU”The easiest way to install QEMU on macOS is using Homebrew:
brew install qemuYou can verify the installation by running:
qemu-system-aarch64 --versionInstalling Neurodesk App
Section titled “Installing Neurodesk App”If you have an existing Neurodesk App installation, please first uninstall it by following the uninstall instructions. Then, install the app for your system:
- Debian, Ubuntu Linux Installer:
sudo apt install -f ./NeurodeskApp-Setup-Debian.deb - Red Hat, Fedora, SUSE Linux Installer:
sudo rpm -i NeurodeskApp-Setup-Fedora.rpm - Arch-based package via AUR:
yay neurodesk(or follow instructions here) - macOS Installer: double-click the downloaded
.dmgfile, then dragNeurodeskApp.appto the Applications folder. To start the app, right-click onNeurodeskApp.appand select Open. For Apple Silicon systems (M1/M2), make sure to enable Rosetta support in the Docker settings for best performance. - Windows Installer: double-click the downloaded
.exefile. Accept to install from an unknown publisher with Yes, then accept the licence agreement and click Finish at the end.
Launching Neurodesk App
Section titled “Launching Neurodesk App”The Neurodesk App can be launched directly from your operating system’s application menu, or by running the neurodeskapp command in the command line.
Note that the Neurodesk App will set the File Browser’s root directory based on the launch method used. The default working directory is the user’s home directory, which can be customised from the Settings dialog.
Sessions and projects
Section titled “Sessions and projects”Sessions represent local project launches and connections to existing Neurodesk servers. Each Neurodesk UI window in the app is associated with a separate session, and sessions can be restored with the same configuration later on.
Session start options
Section titled “Session start options”You can start a new session by using the links at the Start section of the Welcome Page.
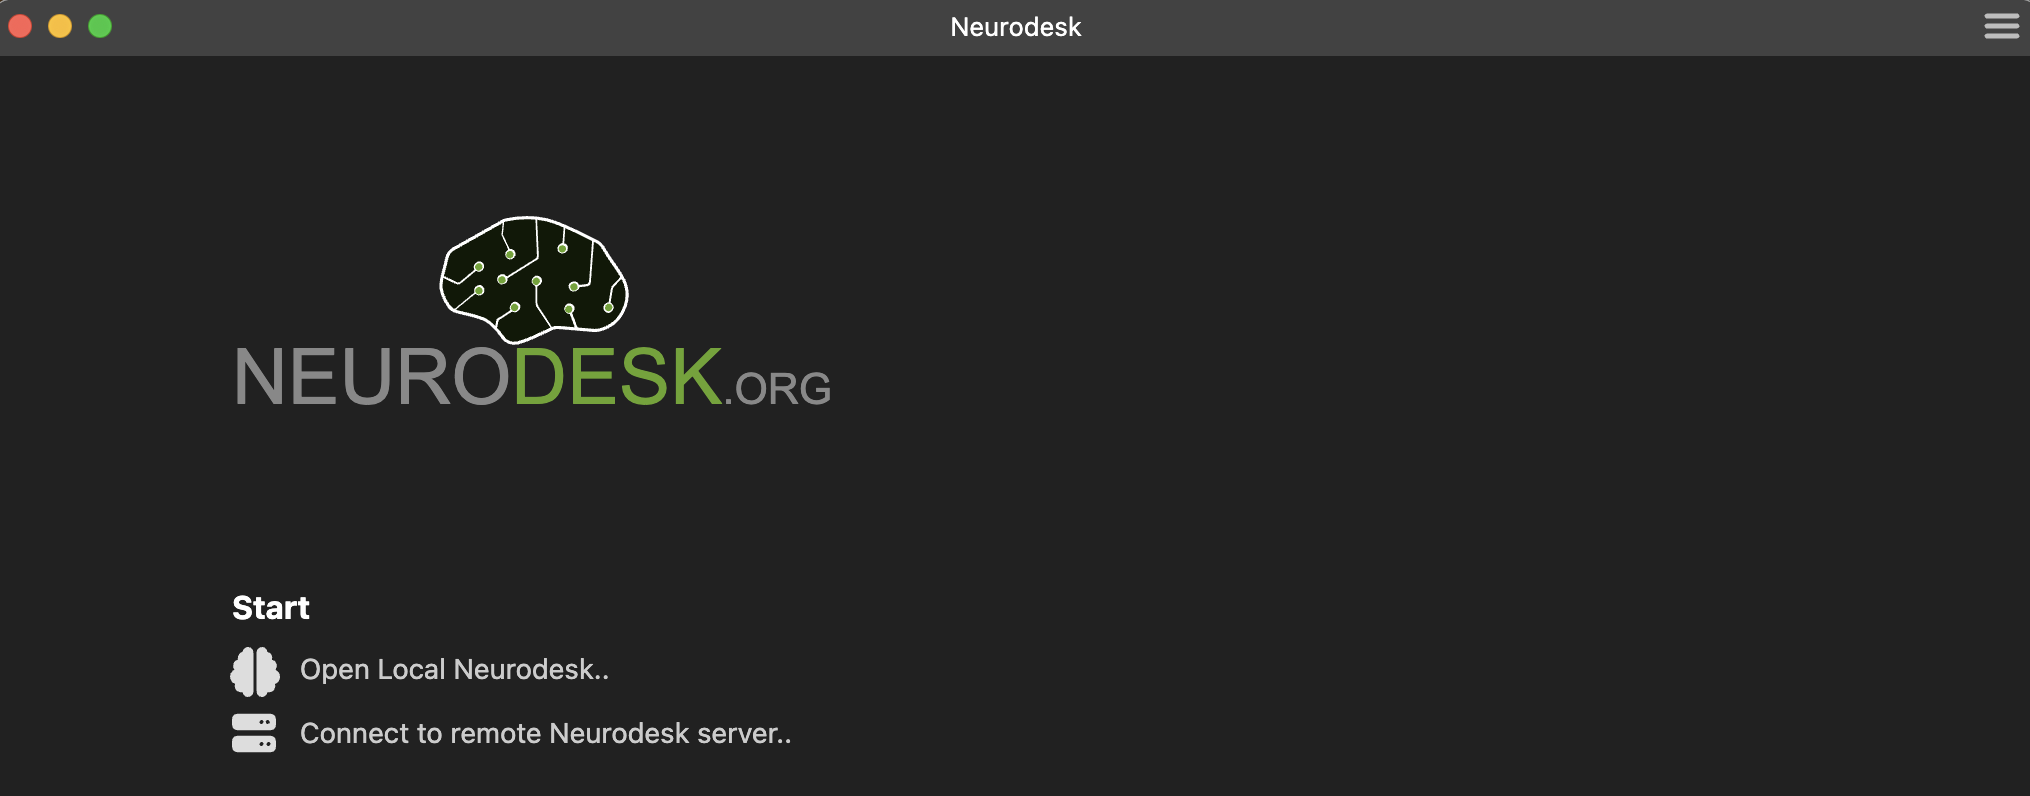
Open Local Neurodesk..creates a new session in the default working directory.Connect to remote Neurodesk server..creates a session by connecting to a remote Neurodesk server.
Previously opened sessions are stored as part of application data and they are listed on the Welcome Page. Clicking an item in the Recent sessions list restores the selected session.
Connecting to local Neurodesk
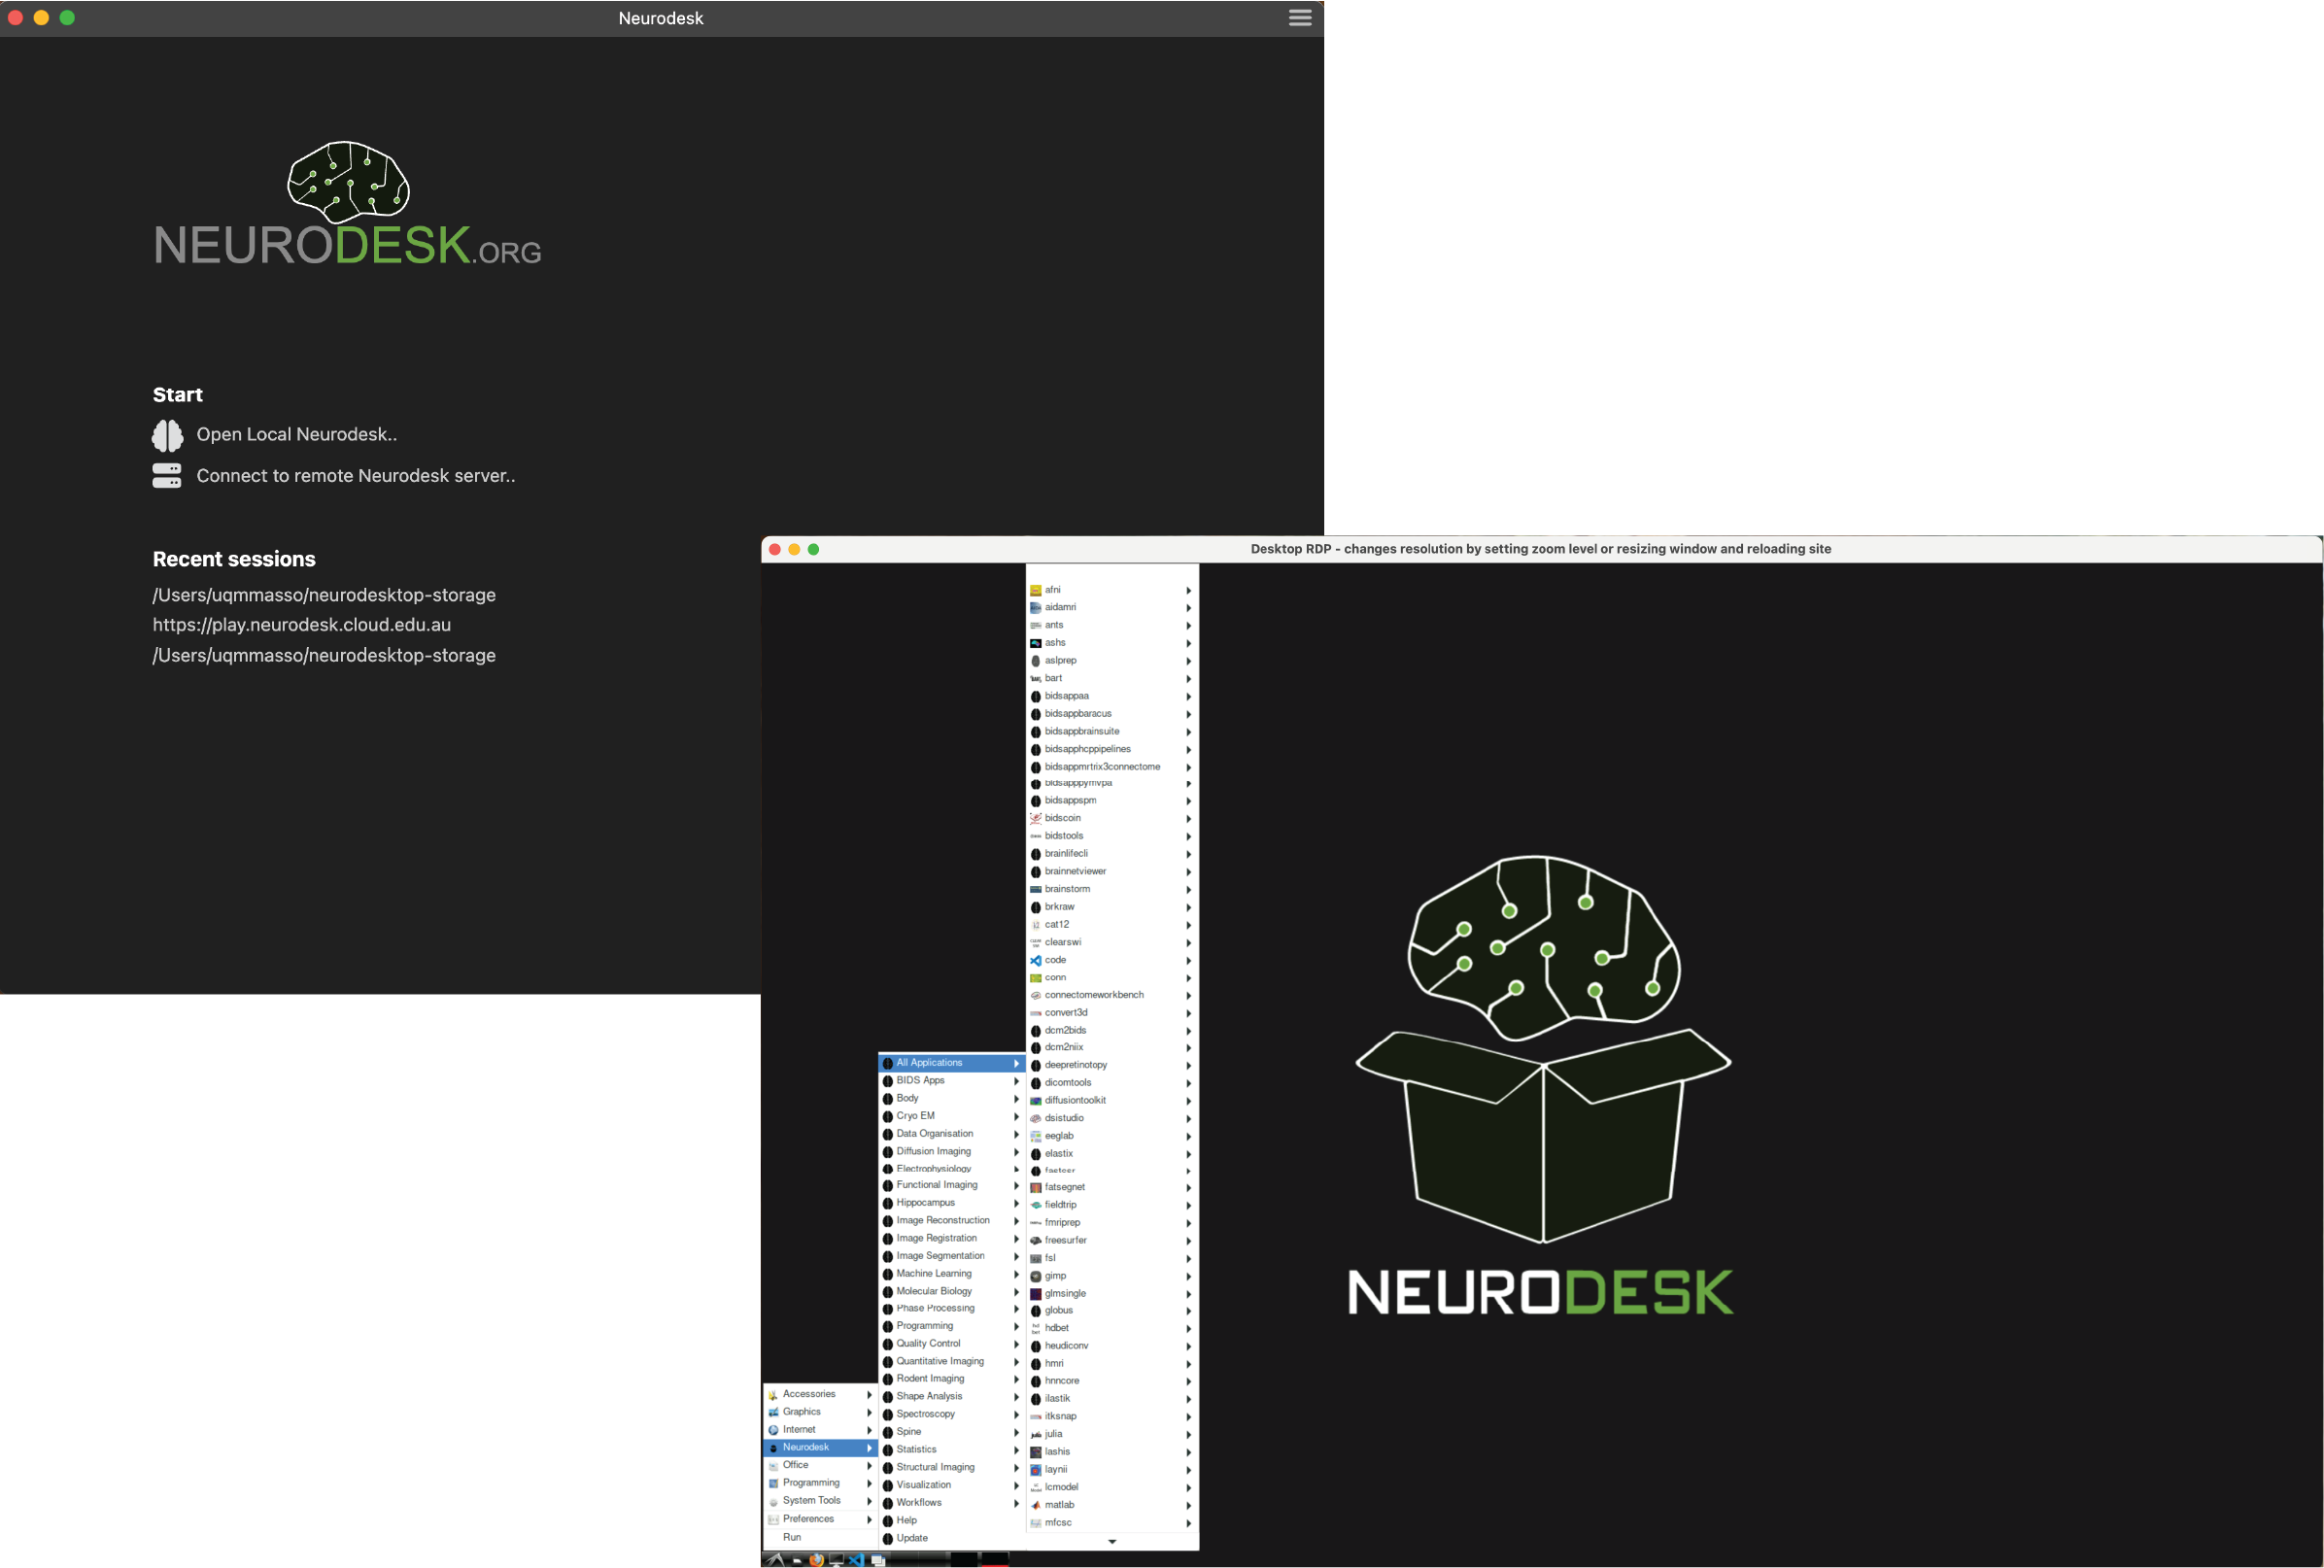
Section titled “Connecting to local Neurodesk”Neurodesk App creates new Neurodesk sessions by launching a locally running Neurodesk server and connecting to it. To open a local instance, click the Open Local Neurodesk.. button in the Start section of the Welcome Page.
This will show a JupyterLab interface. There are two options to interact with Neurodesk through this interface:
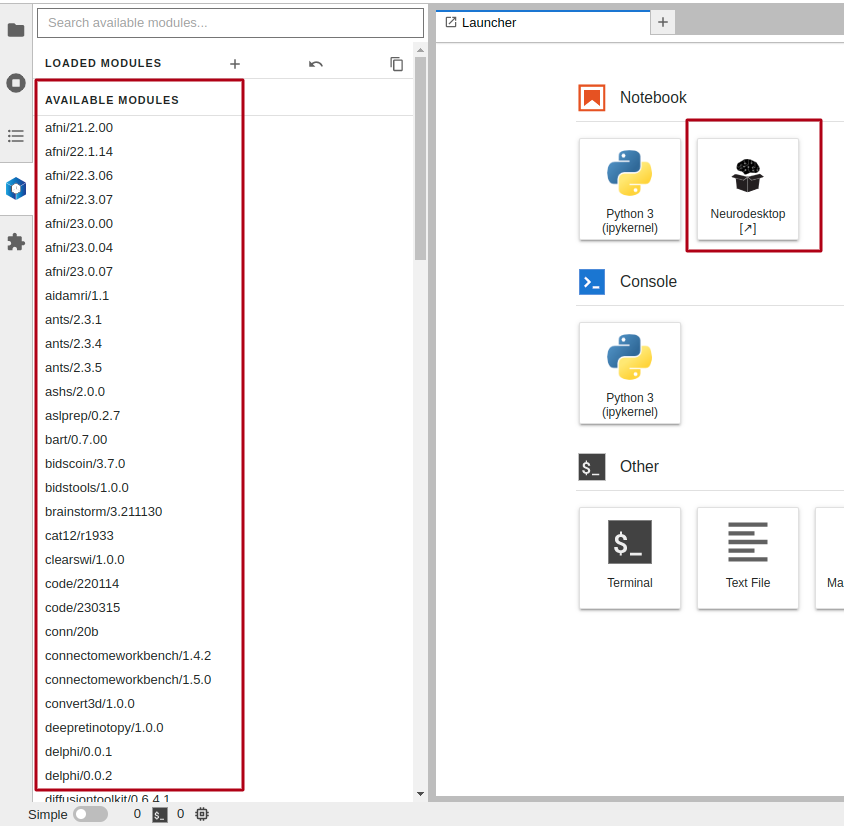
- By clicking the
NeurodeskAppicon on the right. This will launch a new window to start a Neurodesk interface. - By module-loading containers on the left bar. You can interact with loaded modules through the command line interface.
Connecting to a remote Neurodesk server
Section titled “Connecting to a remote Neurodesk server”It can also connect to an existing Neurodesk server instance that is running remotely. In order to connect to a server, click the Connect to remote Neurodesk server.. button in the Start section of the Welcome Page.
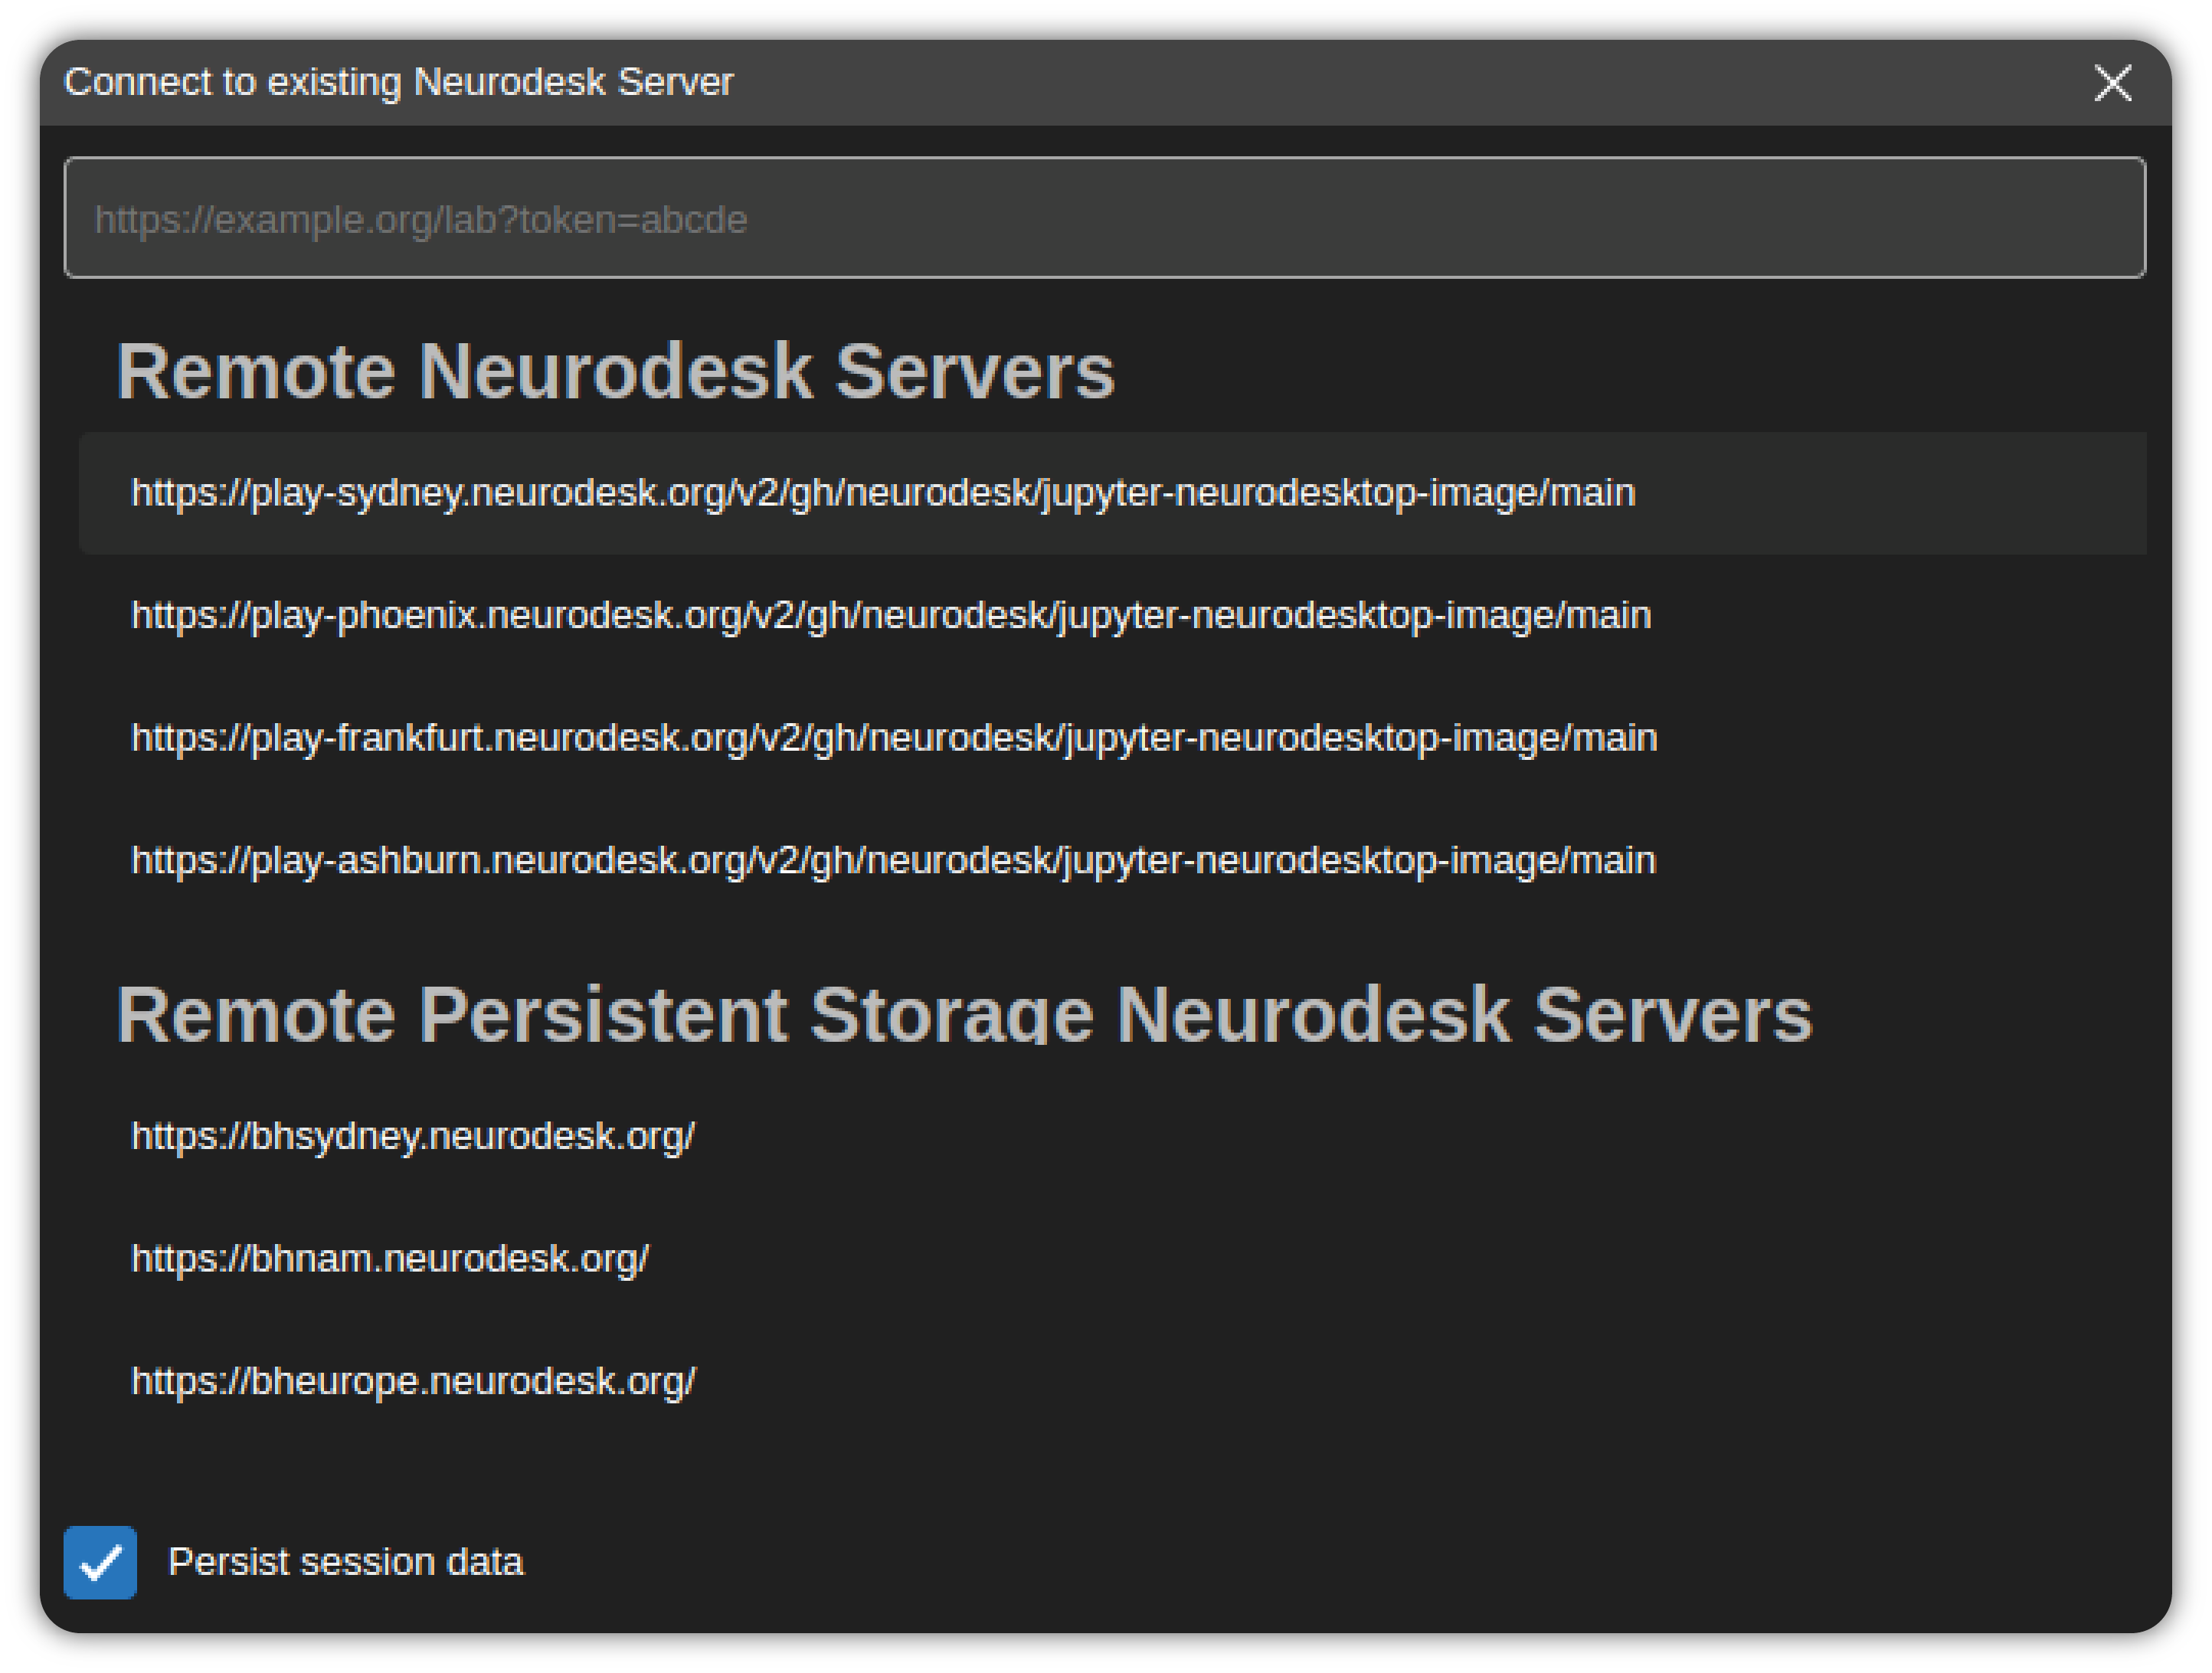
This will launch a dialog that automatically lists the remote Neurodesk server instances.
Select a server from the list or enter the URL of the Neurodesk application server. If the server requires a token for authentication, make sure to include it as a query parameter of the URL as well (/lab?token=<token-value>). After entering a URL, hit Enter to connect.
If the Persist session data option is checked, then the session information is stored and Neurodesk App will re-use this data on the next launch. If this option is not checked, the session data is automatically deleted at the next launch and servers requiring authentication will prompt for re-login.
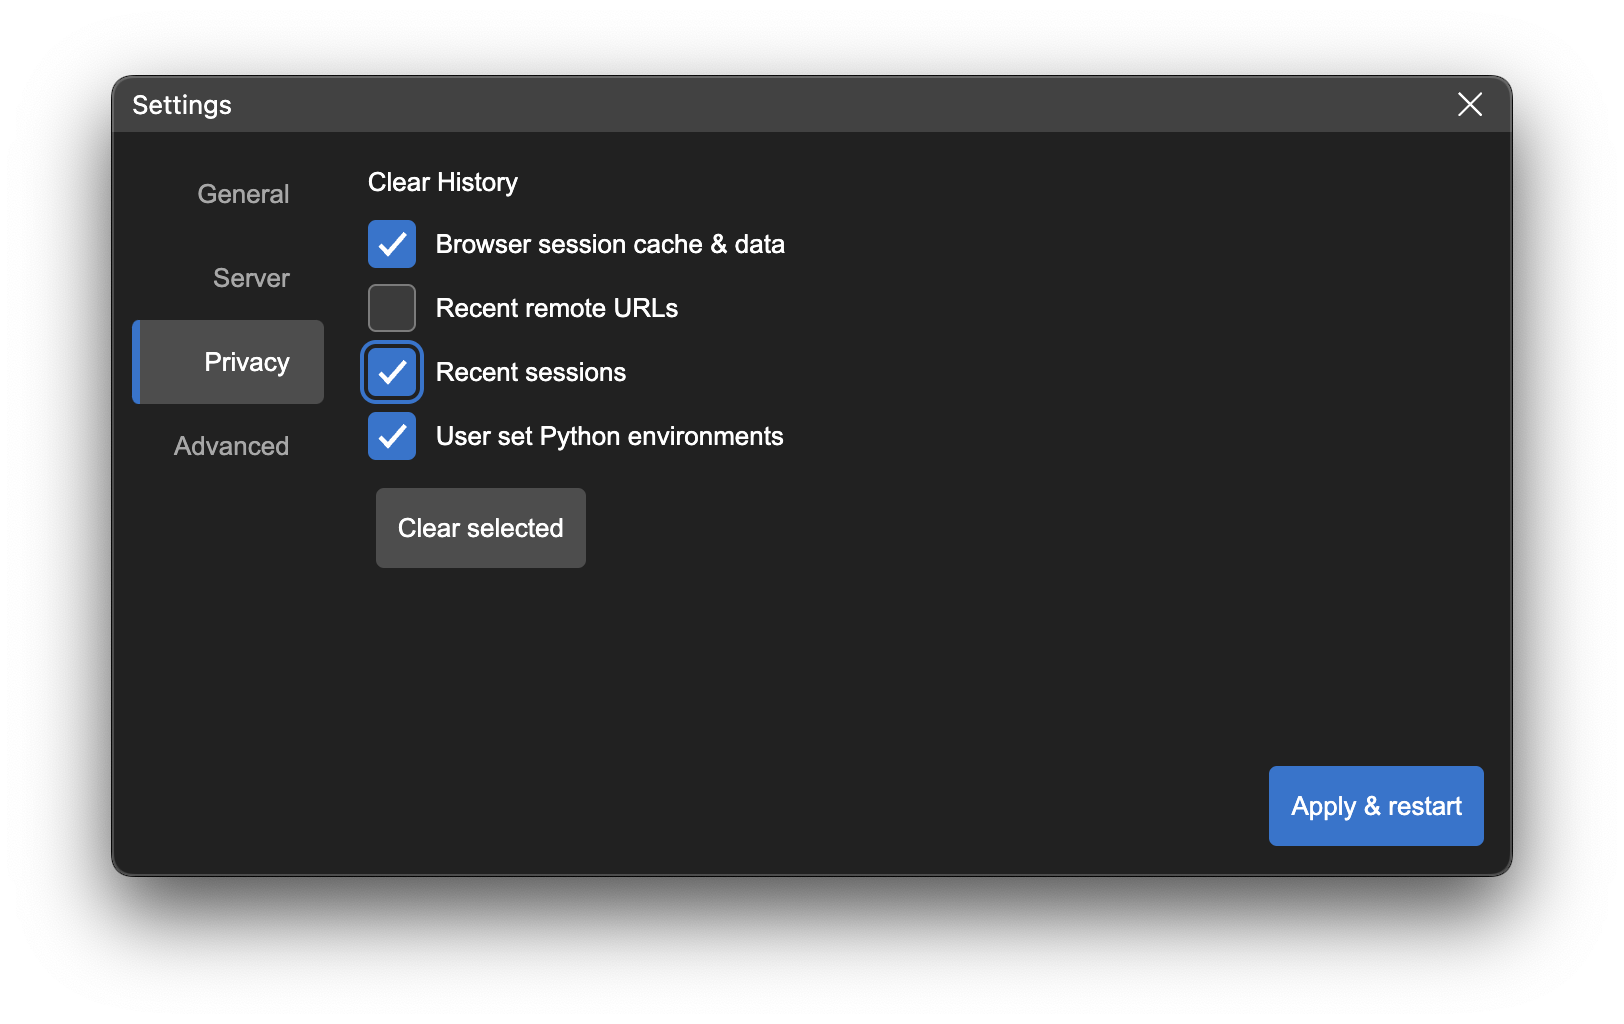
You can delete the stored session data manually at any time by using the Clear History option in the Privacy tab of the Settings dialog.
Configuration and data files
Section titled “Configuration and data files”Neurodesk App stores data in ~/neurodesktop-storage for Linux and Mac, or C:/neurodesktop-storage for Windows, as default.
Add a custom data directory
Section titled “Add a custom data directory”Neurodesk App stores its data in the following locations:
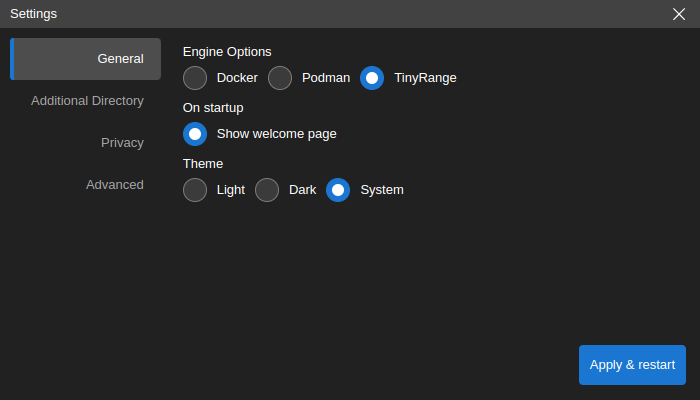
- By default,
/home/jovyan/neurodesktop-storagein the app (bound to the local directory~/neurodesktop-storageon Unix/macOS orC:/neurodesktop-storageon Windows). - By choice: in the settings window below, select Additional Directory on the left side bar, click Change to select the local directory, then click Apply & restart. The next time you start the app, the data from the local directory can be found in
/home/jovyan/data.

Troubleshooting Neurodesk App
Section titled “Troubleshooting Neurodesk App”/var/run/docker.sock: connect: permission denied, docker
Section titled “/var/run/docker.sock: connect: permission denied, docker”This means that Docker is not correctly set up yet. Run:
sudo groupadd dockersudo usermod -aG docker $USERnewgrp docker
sudo chown root:docker /var/run/docker.socksudo chmod 666 /var/run/docker.sock
FATAL:setuid_sandbox_host.cc(158)
Section titled “FATAL:setuid_sandbox_host.cc(158)”If you see the error FATAL:setuid_sandbox_host.cc(158)] The SUID sandbox helper binary was found, but is not configured correctly. Rather than run without sandboxing I'm aborting now. You need to make sure that /opt/NeurodeskApp/chrome-sandbox is owned by root and has mode 4755. Trace/breakpoint trap (core dumped), this is caused by a recent change in Ubuntu 24.04.
A temporary workaround: create the file /etc/apparmor.d/neurodeskapp with this content:
# This profile allows everything and only exists to give the# application a name instead of having the label "unconfined"
abi <abi/4.0>,include <tunables/global>
profile neurodeskapp "/opt/NeurodeskApp/neurodeskapp" flags=(unconfined) {  userns,
  # Site-specific additions and overrides. See local/README for details.  include if exists <local/neurodeskapp>}
Then restart your computer and try to start the Neurodesk App again.
Uninstalling Neurodesk App
Section titled “Uninstalling Neurodesk App”Open the Windows Apps & Features dialog via Start Menu → Settings → Apps and uninstall Neurodesk App.
To remove the application cache, delete the C:\Users\<username>\AppData\Roaming\neurodeskapp directory. The AppData directory is hidden, so activate hidden items in Windows Explorer under View → Show → Hidden Items.
Find NeurodeskApp.app in Finder (/Applications or ~/Applications) and move to Trash with CMD + Delete. Clean other application files:
rm -rf ~/Library/neurodeskapp # remove application cacherm -rf ~/Library/Application\ Support/neurodeskapp # remove user datasudo apt-get purge neurodeskapp # remove applicationsudo rm /usr/bin/neurodeskapp # remove command symlinkrm -rf ~/.config/neurodeskapp # remove application cachesudo rpm -e neurodeskapp # remove applicationsudo rm /usr/bin/neurodeskapp # remove command symlinkrm -rf ~/.config/neurodeskapp # remove application cachesudo pacman -Rs neurodeskapp-bin